Typography is something that brings life to a text. Web designers have a plethora of fonts and type options at their disposal, making typography more visually diverse than ever before.
Your WordPress theme might have only a few selected fonts and you might need to add your own fonts. CSS Hero comes with a comprehensive selection of Google fonts, but for the sake of keeping the plugin light, we didn’t include all of them. However, you can easily add more fonts from Google and other popular sources and use them with CSS Hero.
Since you can’t add a font directly within CSS Hero plugin, you first have to install it on your WordPress website. There are many ways to do that, including uploading a new font folder to your child theme, using the @font-face rule, and then adding CSS code to define where that font will be used. However, this tutorial looks at the easy, fast, zero-coding-involved solutions provided by various font-loading plugins.
How to do it?
The CSS Hero + a font loading plugin will do the things great! Follow the steps below to add your own font using CSS Hero:
- Install and activate a font-loading plugin. For this tutorial, we will use a free plugin- ‘Use Any Font‘.
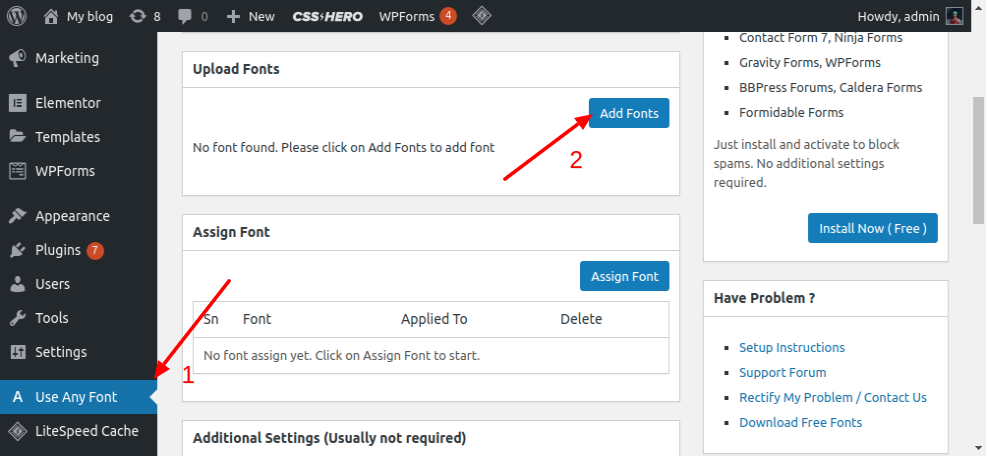
- Go to ‘Use Any Font’ setting and upload the font you want to use.

Steps to upload a font in the ‘Use Any Font’ plugin
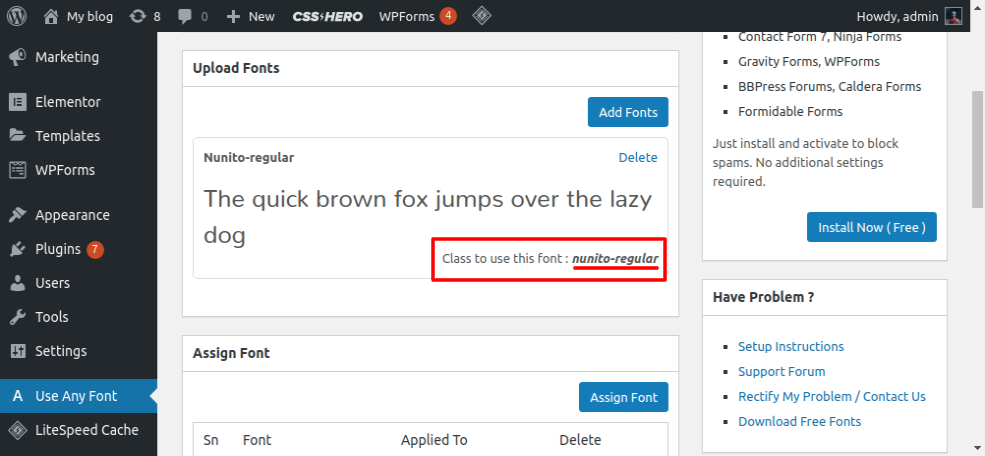
- After uploading the font, copy the font class, we need it in our CSS Hero panel.

The font class name here is: ‘nunito-regular’
- Now, go to the page where you want to add your uploaded font and then click ‘Customize with CSS Hero’.
- CSS Hero’s panel will open on the left side of the page. Click the text whose font you want to change and head on to the Properties option, here you will find the Typography tab. Inside the Typography tab, you will get an option of changing the font-family.

We want to change the font of the red-boxed text to ‘Nunito Regular’, the current text font is ‘Times New Roman’
- Paste the font class name in the font-family input box copied in step 3 above.

We have pasted our font class which changed the text font to ‘Nunito Regular’
- The text font is changed now! Click Save & Publish to reflect the changes.
Congratulations! You have successfully added a custom font to your text with no coding but only using CSS Hero editor.
