Beaver Builder has to be one of our favorite content builders for WP so far, it’s an amazing piece of code which can easily guide you in creating quite complex layouts in almost no time. It’s simple yet extremely powerful and superbly coded.
Of course it works great with Hero out of the box but today we’re going to introduce you a relatively hidden feature which can seriously help you mastering your customizing techniques with Beaver Builder.
Using custom classes with Beaver Builder
Some of you will probably already know that BB gives you the ability to add custom classes to your rows and elements. A custom class is basically a distinctive label we assign to an object in CSS to mark it. If an element is provided with a custom class Hero will automatically provide you the editing tools to customize that element accordingly to that custom class.
First of all let’s see how Hero works on some BB generated contents out of the box, with no custom classes:
As you can see Hero grabs the automatically generated class for each element, this works great if you’re willing to limit edits to all element instances in the same row, however in some cases you may want those edits to extend to other elements in other rows or simply to assign a custom style to a specific element only in a row which may contain other instances of the same element which you don’t want to affect.
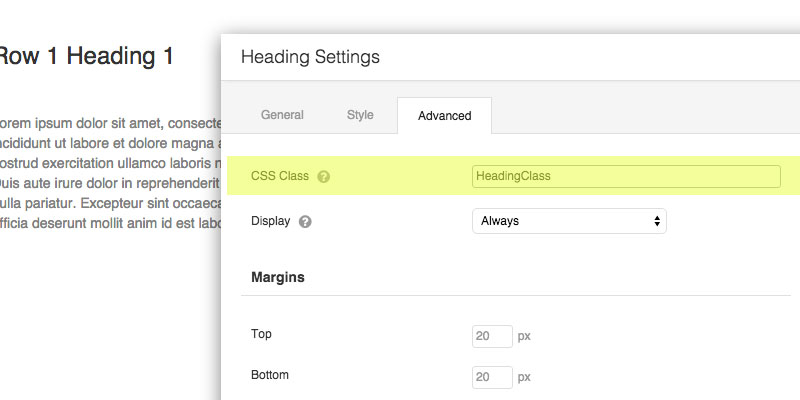
Ok let’s move on and let’s assign our first heading a custom class that we’ll call ‘HeadingClass’.
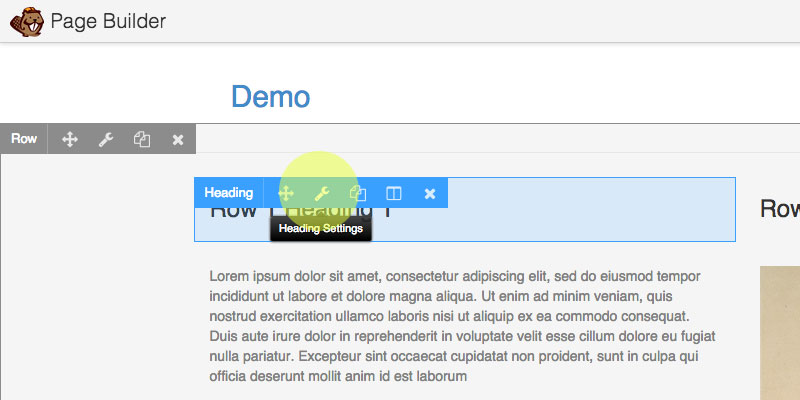
In order to assign a custom class to an element you’ll have to launch Beaver Builder, hover the element you want to edit, hit the Tools icon and the Advanced:

here you’ll find the CSS Class field which is the one we’re looking for:

Now our Row 1 Heading 1 element has a custom class! Hero will now automatically detect that class and styling it will affect only that element in that row. Of course you can add that same class to any other heading in the same row to let Hero extend the edits to all the elements you need to look the same in that specific row. Cool!
Now what if we needed to style the same multiple elements across rows and pages?
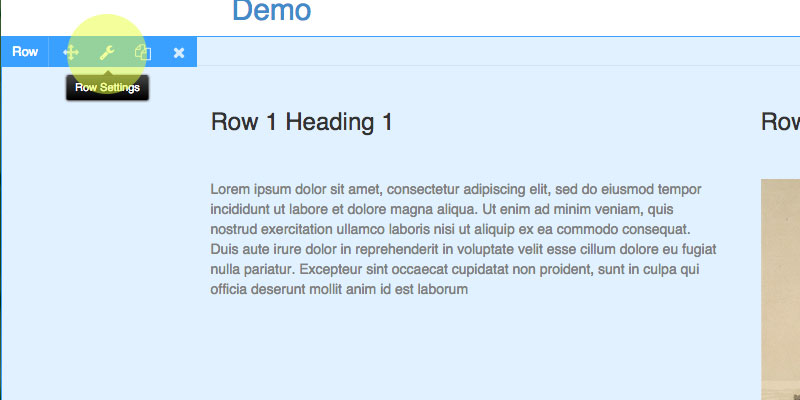
Just add a custom class to more rows and Hero will style them accordingly. Remember the label thing? Now we’re applying a label to the whole row instead of a single inner element, we’ll call that class RowClass. Let’s see how:

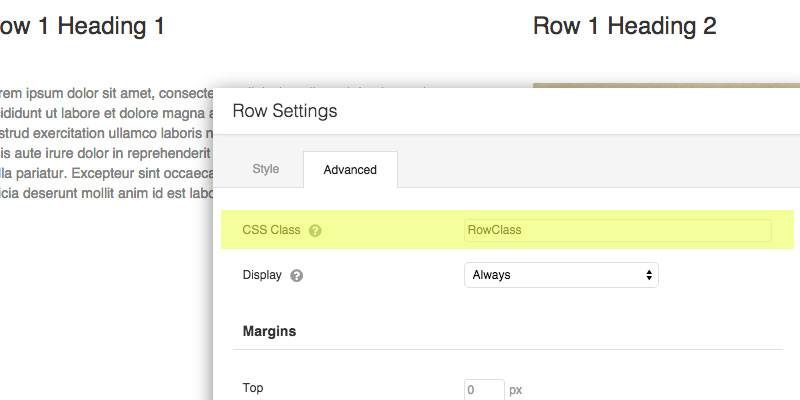
And we add our RowClass as custom class:

In the following video we’ve added the same RowClass to the second row to extend the first row style to the second one:
Of course this same process can be replicated on multiple pages rows allowing global edits with Hero. Moreover you can combine assigning both row classes and inner element classes in order to have even more control on your elements:
We hope this quick guide will help you in mastering your Hero techniques on Beaver Builder. Please don’t hesitate to comment and ask if there’s something not clear, we’ll be happy to help!
Bonus tip: Hero also supports BB elements provided with multiple classes, have fun! 🙂
